

I was inspired to give my little girl the sweetest first birthday party without spending a ton of money or exhausting myself. Read on for ideas for a simple and sweet first birthday party for your daughter!

Daisy Theme First Birthday
When my youngest daughter was turning 1 I wanted her first birthday to be really special. Her cousin is only 30 days younger so we decided to make it a combo birthday. The details you’ll see here are so cute and sweet and so so easy. I want to inspire you that you can still have an adorable “Pinterest-worthy” party without being super crafty, great in the kitchen or staying up all night. See the pics and tips below!
Glam up a store-bought cupcake and candle.

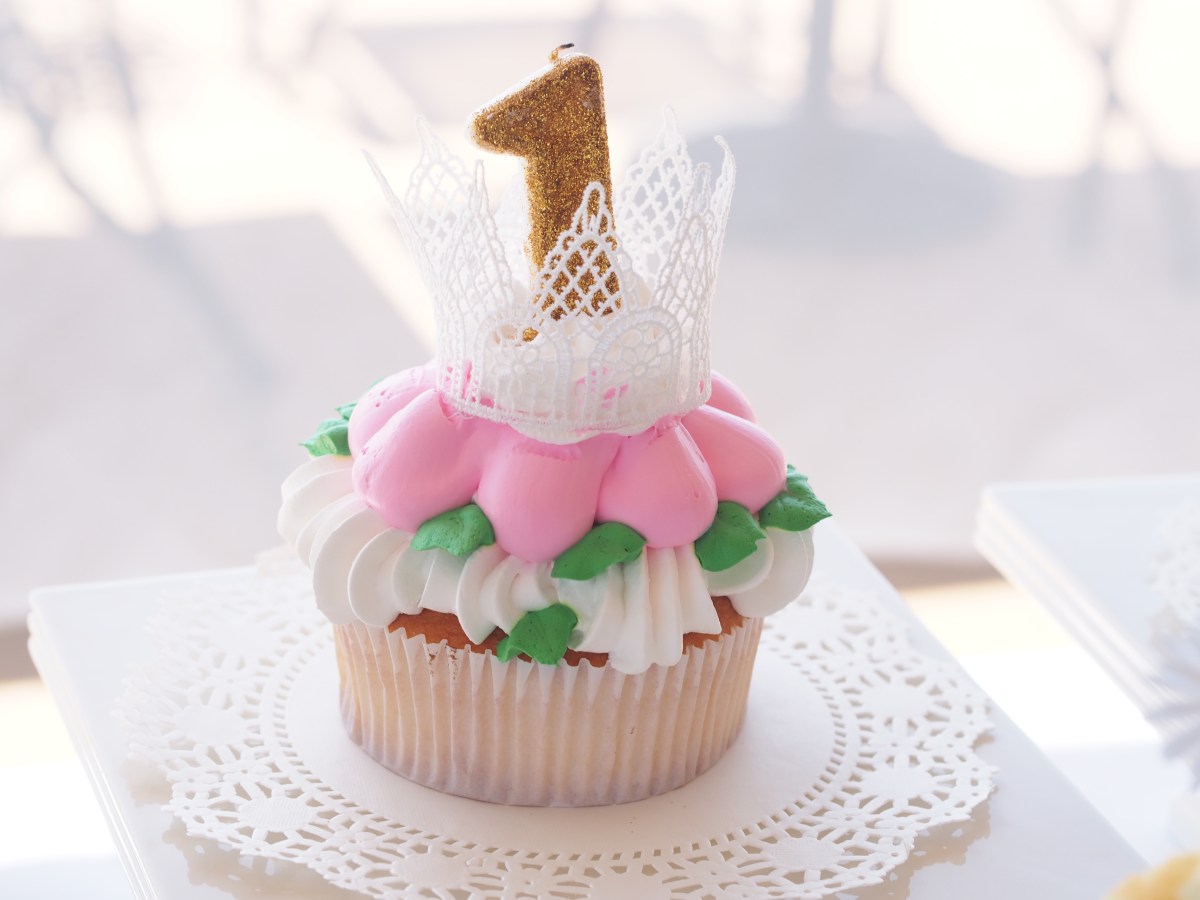
For a fun tutorial on how to make this lace crown headband check out my post HERE!
For this theme we wanted something happy and to me happy means sunny!
Cupcake hack- how to personalize store bought cupcakes.

I found these cupcakes at our neighborhood Ralph’s! Yep, that’s right I did NOT make cupcakes for this party. Nor, did I spend a small fortune at a bakery for them. Ralph’s carries a brand called Kimberley’s, and they come in a pack of six- and they are delicious! For the cupcake toppers I found daisy stickers (similar ones found here) and stuck a toothpick to the back of them! I loved the idea of fence cupcake wrappers because it gave the cupcakes a sunny daisy “garden feel.” Find similar ones HERE.

Sugar cookies double as food and decor for a first birthday.

Another thing that can make a big impact for a little girl’s birthday party are sugar cookies! This is a perfect example of outsourcing to friends! I’m not a sugar cookie expert. I think its an art that takes a lot of practice to perfect, and let’s face it some of us do not have the talent or patience to pull this off well. A friend made these for us, and she did such a cute job! She used the birthday girls’ initials, and also a cute flower daisy cookie cutter to fit the theme. If you don’t have a talented friend who can make these Etsy is another great resource for finding affordable custom made baked goods.
Invest in a statement piece you’ll use again and again.

A long time a go I found this adorable cupcake ferris wheel stand online. Only at the time these only came in silver so I had to spray paint it white. I thought it was the perfect complement for decor for a little girl’s birthday party. And it makes a great centerpiece or focal point for your dessert table!

Easy party food ideas for a first birthday.


For the kids we cut out pb&js’s in the shape of daisies (find the sandwich cutter HERE), and served quiche to the adults. Quiche can be made ahead and with just a few ingredients. Or, you can buy it and warm it up in the oven before serving. Quiches are usually inexpensive and easy to make, and also can feed a crowd. For the food labels we just used a burlap colored card stock, and put them in mini frames from Michaels that we can use again and again.

Affordable and easy decorating tips and ideas for a first birthday party.
TIP! Decide on a specific color palette and build everything off of that.
We used yellow and white for this daisy them and accented with burlap. You find yellow and white in the food (from the quiche, to the lemonade, cupcakes and cookies). You also find yellow and white in the decor (table settings, dishes, labels, garlands, and lanterns.) This first birthday party is also a good example of how food can double as decor! The burlap color was used in the twine for the garlands, clothespins, paper for the labels and the table runner.
Idea 1: Use paper lanterns.

I love lanterns! They’re affordable, fold down flat for storage and make a huge impact. I buy them in lots of colors from Oriental Trading co and HERE on Amazon.
Idea 2: Make a DIY garland.
The garland you see above was made with pictures from each month of their first year. A lot of these are instagram pictures so I had our local pharmacy print them in a square format. Then, I just attached them to twine with a mini clothespin. So easy and so personal. They’re really fun to look at.

For this garland you can either find a clip art of a triangle online and print it in the size you want, or you can trace the outline of an existing garland. Pick the card stock you want and cut out as many triangles as you need. I attached the triangles to jute twine using mini clothespins from Michaels. Jute twine is a staple in my pantry- and my craft room! It’s useful for working in the kitchen of course, but is also so cute to wrap gifts or baked goods. Another idea for jute twine is to wrap bread in parchment paper, tie it with twine and put a sprig of rosemary or lavender behind the knot. So cute and so easy! Find the daisy stickers I used HERE


DIY Yellow Daisy Bunting Garland
Equipment
- pair of scissors
- triangle template (traced or printed)
- tape
- sharpie, pencil or marker for tracing your triangle pattern
Ingredients
- 8 1/2 x 11 card stock paper yellow
- daisy stickers
- kitchen twine
- mini clothespins
Instructions
- Create a triangle template. (you can either print this from a design you find or create on your computer or trace around another garland you already have)
- Lay your template on top of a piece of colored card stock and trace out the triangle design onto the card stock. (Repeat this step for as many triangles you want to add to your garland.)
- Next, decide how long you want your garland to be and trim your twine to the desired length.
- Cut out your triangles.
- Place one daisy sticker on the middle of each triangle.
- Attach the twine to the desired location by either tying each end or taping them.
- Take a clothes pin and clip the bottom of the triangle (not the pointy end) to your twine. Evenly space them out.
Idea 3: Fresh flowers are an affordable way to make a big statement.

Flowers don’t have to be complicated. You can find affordable flowers at your grocery store, neighborhood farmers market, Trader Joes or even your own backyard! TIP: pick flowers that match your theme color(s), and group one or two varieties for the biggest impact.


This was such a sweet, easy fun party to host. Everly Elle was happy and at the end of the day that’s all that matters. I hope you found some inspiration! For loads more party inspiration check out my Pinterest page! And to connect with me daily find me over on Instagram. As always thanks for stopping by!
XO,

