


Don’t be overwhelmed by the idea of painting a stencil on a wall. This is actually something anyone can do! Read below for all my best tips!

One Room Challenge Garage Makeover Update
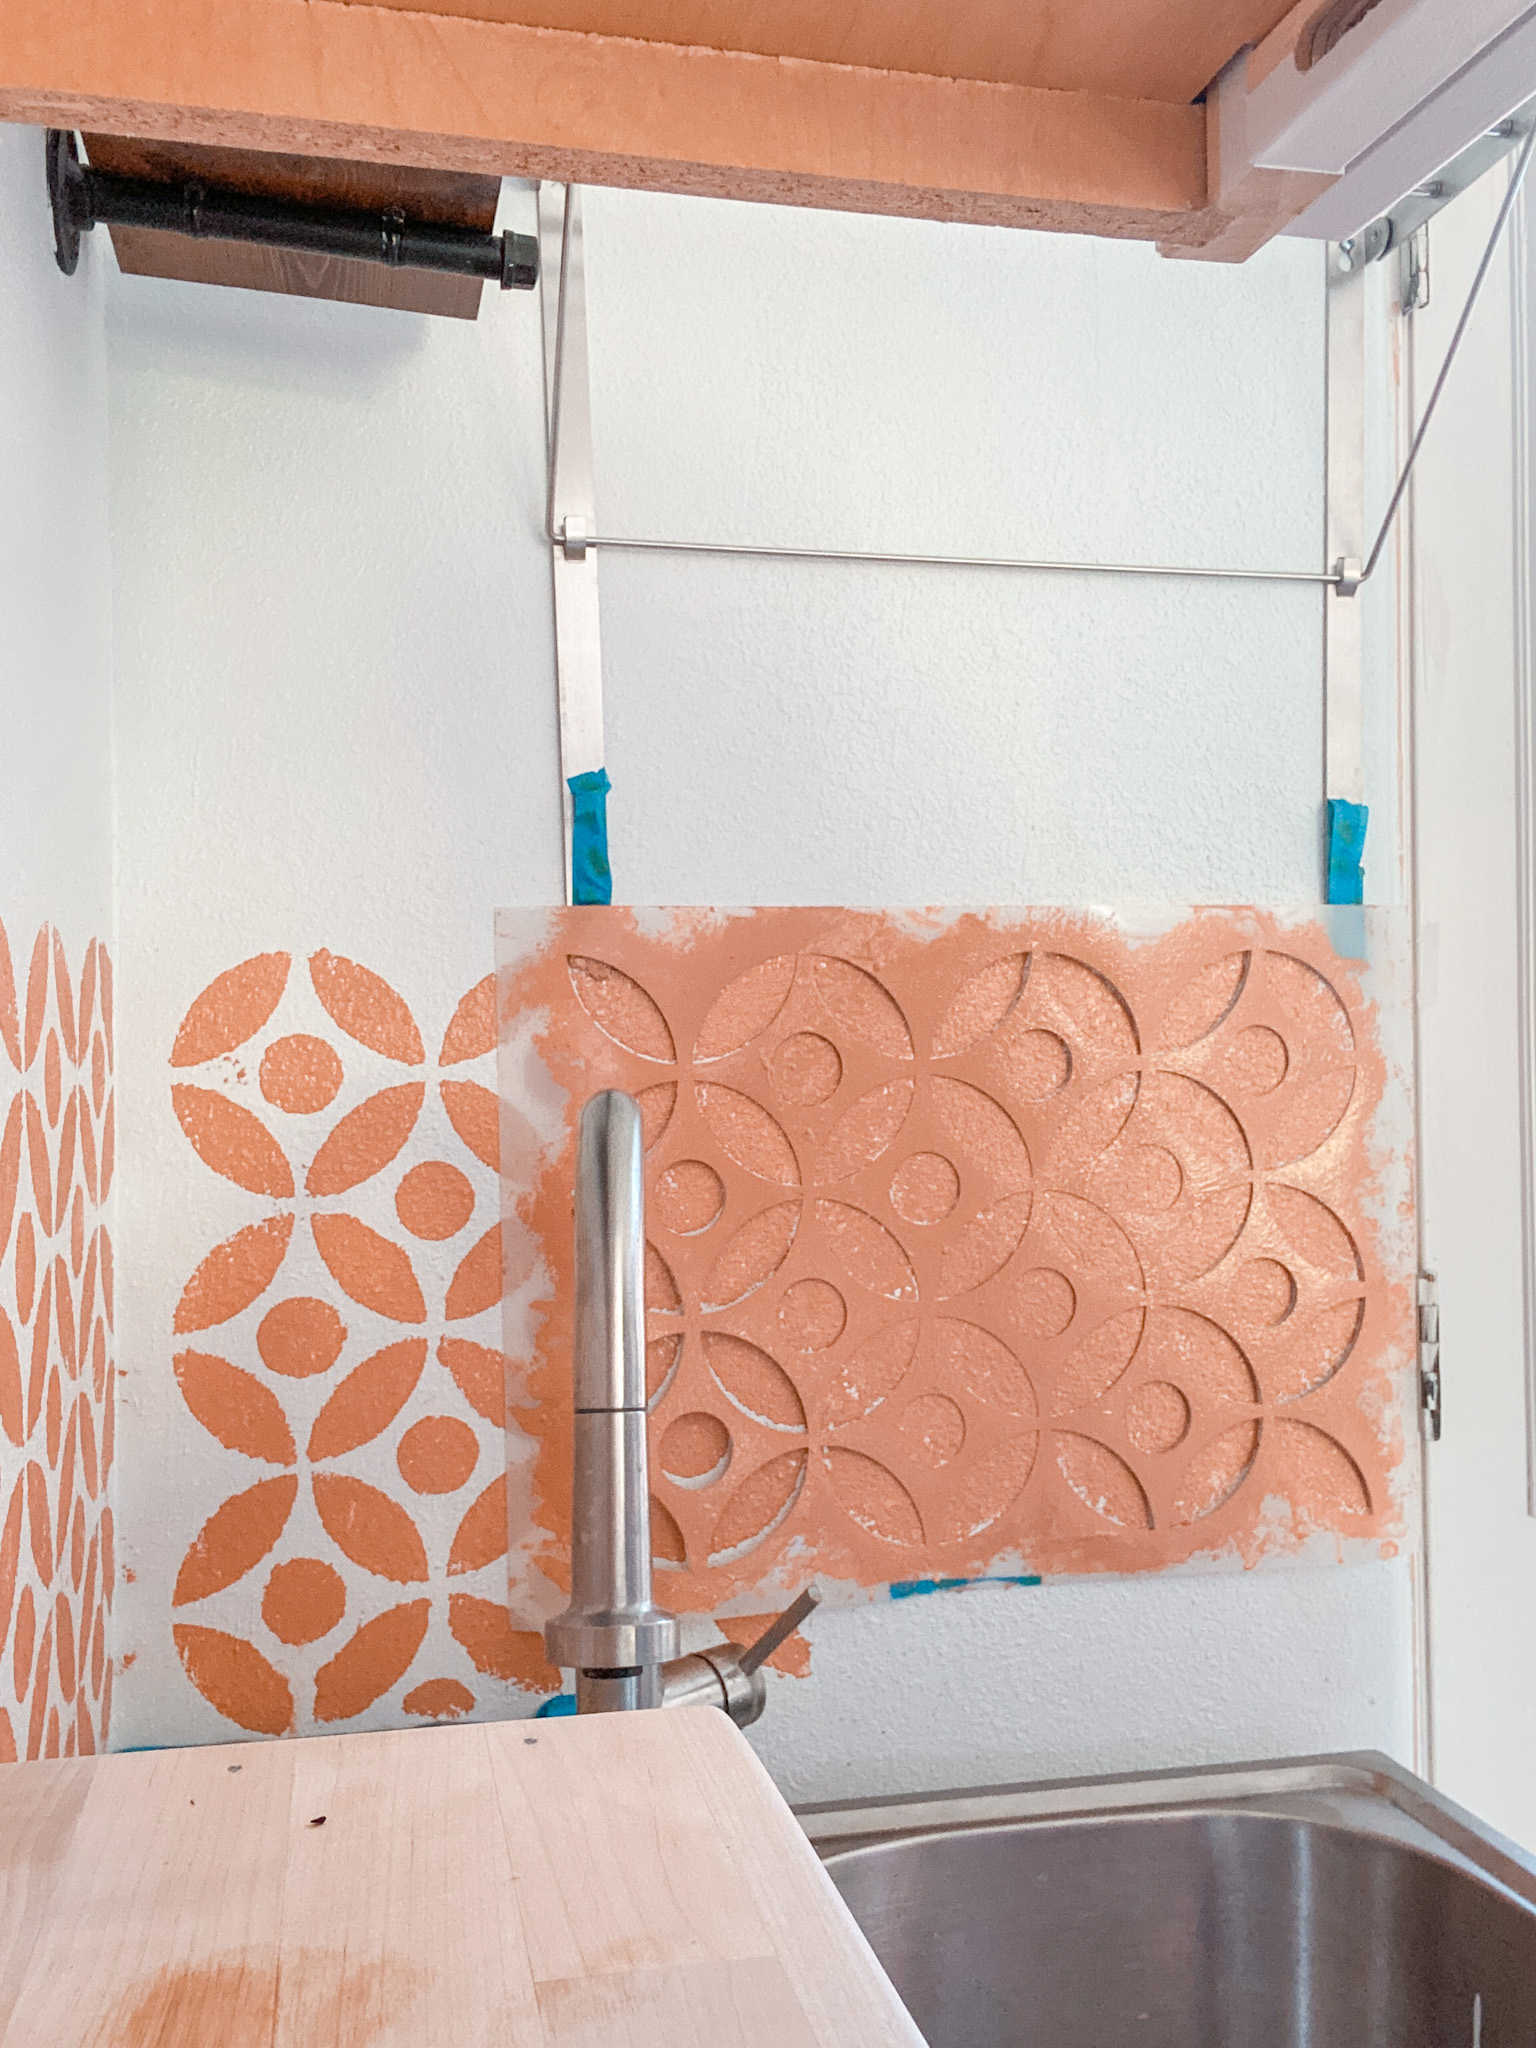
The garage I’m making over is slowly coming together. This week I wrapped most (MOST) of the DIY backsplash I’ve been painting. Because my walls are HEAVILY textured I knew aside from installing actual tile my only option was paint. And, because its a garage I couldn’t justify spending the extra dollars on the cost of tile and labor.
Stencils allow anyone who isn’t an artist to look like an artist.
Laurie Welsh
Paint really is the most affordable way to transform a wall. And best of all, you can change it whenever you want. Stencils allow someone who isn’t an artist to look like an artist!!! Now I realize the idea of painting a stencil on a wall can sound intimidating to a lot of people, but I’ve actually tackled this project several times. And, because its paint you have a lot of grace if you make a mistake. You can always paint over it right? 😉 But in this post I’ll show how I speed through this process, and what I do to make it as easy as possible.


Supplies you need for painting a stencil on a wall.

Some of these supplies like the tape or adhesive you will absolutely need. However, the applicator you choose for applying your paint is completely up to you. I’ve tried them all. The ones I’ve listed below are my favorites.
- Painters Tape or spray adhesive


- acrylic or latex paint (pick a sheen depending on the “effect” you want your stencil to have) ex. the same hue in two different sheens like matte and high gloss came create a really cool look
- stencil brush

- foam paint dabber (my favorite applicator!)
- sea sponge (These come in a variety of sizes. The larger the sponge the more area you can cover. Although, keep in mind this can give your design a more “textured” look. In this case, that’s exactly the look I was going for.)

- Paint tray and wooden stir stick (be sure to ask the paint store for a couple sticks and a tool to open your can when you go to get your paint)

- Oil cloth or some type of protective covering to prevent spilling accidents

- q tips and/or wet cloth for correcting mistakes
- small level

DIY tips and tricks for stenciling an accent wall. For my color block accent wall tutorial check out this post HERE!
STEP 1: PREP YOUR SPACE

Clean the wall with a rag. Give it a good wipe down. This will take care of any dust, cob webs (yuck!) etc. Next, you’ll want to use your painters tape to cover any edges or things you don’t want painted. After that, use a drop cloth to cover and protect your space.

STEP 2: CREATE A WORKSTATION AREA

By creating a neat and organized spot for the tools you will be using you will in turn save yourself so much time and headache. I can not stress this enough!! Find a table, cart etc and first line it with a protective covering. Next, set out your paint, spray glue or tape, wiping cloth, paint tray etc.
STEP 3: PREPARE YOUR PAINT AND APPLICATOR
Now its time to open the paint, and stir for at least 60 seconds. Then, once it’s thoroughly mixed pour it into the paint tray. Next, if you you’re using a foam dabber or sponge lightly apply some water, and then give it a good squeeze to remove all of the excess water.
STEP 4: DAB YOUR APPLICATOR INTO THE PAINT AND DAB IT AGAIN ONTO THE TRAY.
I can not stress enough how important it is to give your applicator another quick dab onto your tray! A leading cause of paint bleeding under stencils is the direct result of too much paint on the applicator.
STEP 5: PICK WHERE YOU WANT TO START AND PREP YOUR STENCIL.

I usually like to start in the top left corner and either work my way left to right horizontally, or left to right vertically. You can use some tape along the top of your stencil to help it stick, but keep in mind once you start going down the wall on the repeat you will need to take the tape off. Spray the back of your stencil with a coat of adhesive.
STEP 6: PRESS THE ENTIRE STENCIL ONTO THE WALL. USE A LEVEL IF NECESSARY.

STEP 7: DAB, DON’T BRUSH! THE PAINT INTO YOUR DESIGN!
Another reason paint bleeds under stencils is because it was brushed on. Whether using a sponge, stencil brush or dabber be sure to DAB the paint until the design is fully covered.
A leading cause of paint bleeding under stencils is the direct result of too much paint on the applicator.
Laurie Welsh
STEP 7: REMOVING THE STENCIL.
THIS NEXT STEP IS COMPLETELY UP TO YOU.
After you’re done painting the stencil immediately remove it. Or, if you prefer, let it sit for a few minutes so it can dry a bit. This depends entirely on how quickly you would like to move through the project. In my experience, I have never had a problem immediately removing my stencils. The main reason for waiting to move on is to prevent smearing. If you are careful to lift the stencil up and off you should be fine. Just don’t drag or slide it. Grab two opposite corners and starting with one side slowly pull it AWAY from the wall towards you.
STEP 8: CLEAN UP ANY MISTAKES.

If you do see paint where you don’t want it now is the time to wipe that up. Using or corner of your wet cloth or a wet q-tip carefully blot or wipe up the paint.
STEP 9: CHECK THE BACK OF YOUR STENCIL AND WIPE AWAY ANY SIGNS OF WET PAINT. THEN, GIVE IT ANOTHER LIGHT SRAY OF ADHESIVE.

STEP 10: CONTINUE THE PATTERN.
Match up the design by laying the outer edge of the stencil over the edge of the same painted area. Lightly press the overlaying section to the wall taking care not to cause any bleeding. Hold the overlapping area down and start painting your new area. This method will be the same regardless of what direction you choose to stencil. Repeat this process until you are done!
Awesome stencil sources for painting a stencil on a wall.


ETSY also has tons of cute designs! Find the one I used for my garage HERE!


FREQUENTLY ASKED QUESTIONS:
- Can you use any paint to stencil? Yes! Just be sure to pick a paint that works with the surface you are painting. ex. fabrics will need fabric or acrylic paint, walls usually like latex, wood likes acrylic or latex etc.
- Why is my paint peeling up with my stencil? Because you let the paint dry completely. Its important for the paint to still be wet or slightly damp when removing it.
- Can I reuse my stencil? Yes! Once you’re at a stopping point carefully wash off any wet paint. You can dab dry with a soft cloth or let it air dry. The reason I recommend wiping off any paint you can is because the stencil gets heavier the more dried paint it has on it. This extra weight makes it harder to stick to your wall. Roll it up and put a elastic band around it or store it flat where it won’t get damaged. You don’t want any edges of the design getting bent.
- Where do you start when stenciling a wall? I like to start in the upper right corner and either work my way down or to the right until I reach the opposite corner.
Thanks so much for following along on my journey! Stay tuned for next weeks’ post where I’ll share the full reveal of my finished garage! For daily decor inspo find me on Pinterest and for life and all the behind the scenes connect with me over on INSTAGRAM!

